
CONNECTING TO GATE EXCHANGE,
activating subaccounts
We recommend registering an account on the Gate exchange using the Moonbot referral link:
https://www.gate.io/signup/MOONLOVE?ref_type=103
For all accounts registered through this link, an automatic cashback of 20% on spot and futures trading applies.
After activating the PRO version using the Moonbot referral link, the following bonuses will be available to you:
- GT auto-buy option;
- MoonHook strategy;
- Price simulation on the chart using the Pencil tool;
- Chart monitoring module in separate windows;
- Moon Kernel module — client-kernel mode for faster manual trading.
The Moonbot terminal for Gate supports both spot and futures markets.
When using the Moonbot terminal for Gate on a dedicated server, it is recommended to select the Japan (Tokyo) location for better ping.
Activation of subaccounts is performed through the Moon Credits window (instructions are provided below), and this requires 500 Moon Credits — for activating each subsequent subaccount. Moon Credits are available only to users of the PRO version of Moonbot.
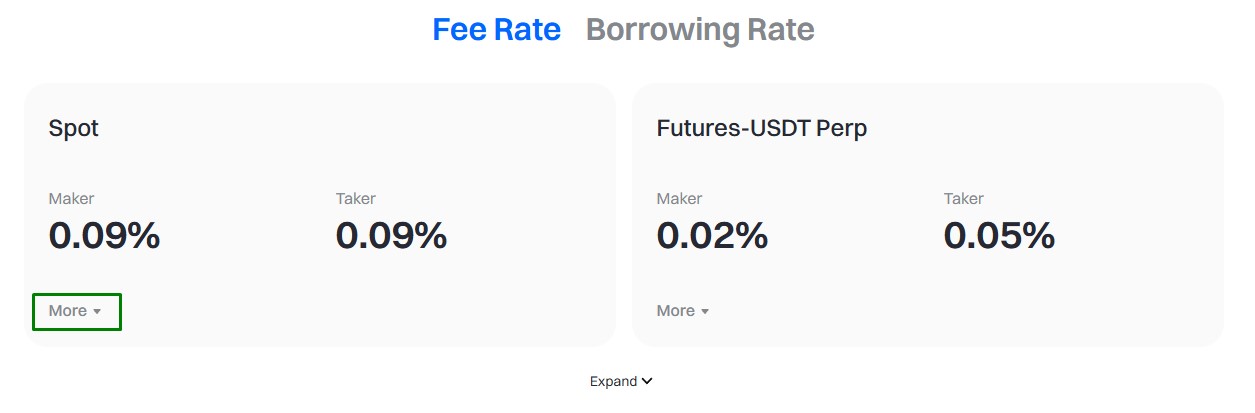
Enabling Fee Payment in GT
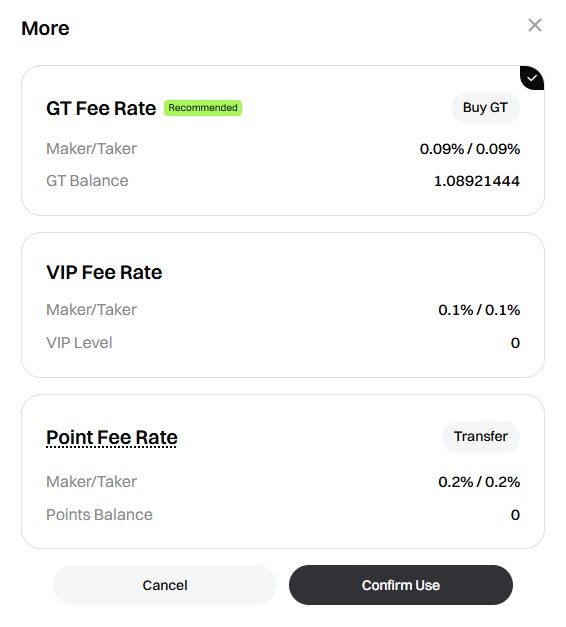
To receive a discount on trading fees, you need to:
- Purchase several GT tokens;
- Go to the My Fees section in your exchange account;
- In the "Fee Rate" section, click on "More";
- Select "GT Fee Rate";
- Click "Confirm Use".
Instructions for Creating API Keys in a Gate Exchange Account
Activation of the futures account on the Gate exchange
A futures account on the Gate exchange is created automatically only after transferring a certain amount of funds to it.
If, when entering the API key, the following error appears in the Moonbot log:
"label":"USER_NOT_FOUND", "message":"please transfer funds first to create futures account", then perform the following steps:
- Log in to your Gate exchange account;
- Go to the futures trading section;
- Transfer any amount of USDT to the futures account.
- Then go to Account → API Key Management and click the Create API Key button
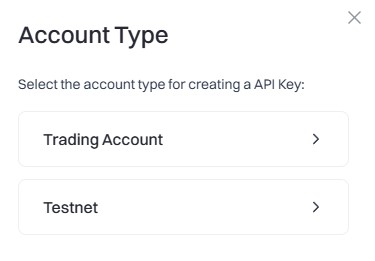
- In the Account Type window, click Trading Account.
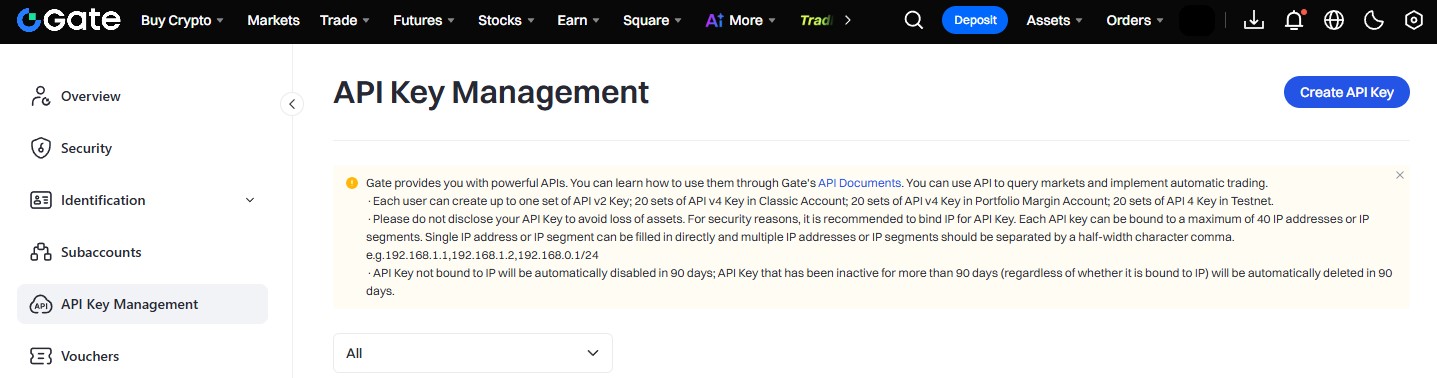
In the Account Type window, click on the Trading Account:
Please note!
Each user can create up to 20 sets of API v4 keys on a classic account.
The required permissions for the API key must be set when it is created. If not all permissions were selected, errors may occur after registering the key in the Moonbot terminal when attempting to use it, and you will need to create a new API key, since editing an already created API key is not recommended.
In the API Key Note field, enter its name, for example MOONBOT.
In the IP Permissions options you can choose:
- ind to IP
For security reasons it is recommended to bind the API key to an IP address. Each API key can be bound to a maximum of 40 IP addresses or IP segments. After selecting this option, an additional field will appear where you can enter a single IP address or an IP segment directly, and multiple IP addresses or IP segments must be separated by commas.
Example: 192.168.1.1, 192.168.1.2, 192.168.0.1/24;
- Later
Without binding to IP. An API key that is not bound to an IP address will be automatically disabled after 90 days; an API key that has been inactive for more than 90 days (regardless of whether it is bound to an IP address) will be automatically deleted after 90 days.
In the API Key Type options you can choose:
- API v4 Key (this option should be selected by default);
- API v2 Key.
In the Account Type option select:
- Trading Account.
In the Permissions options select the permissions according to the screenshot.
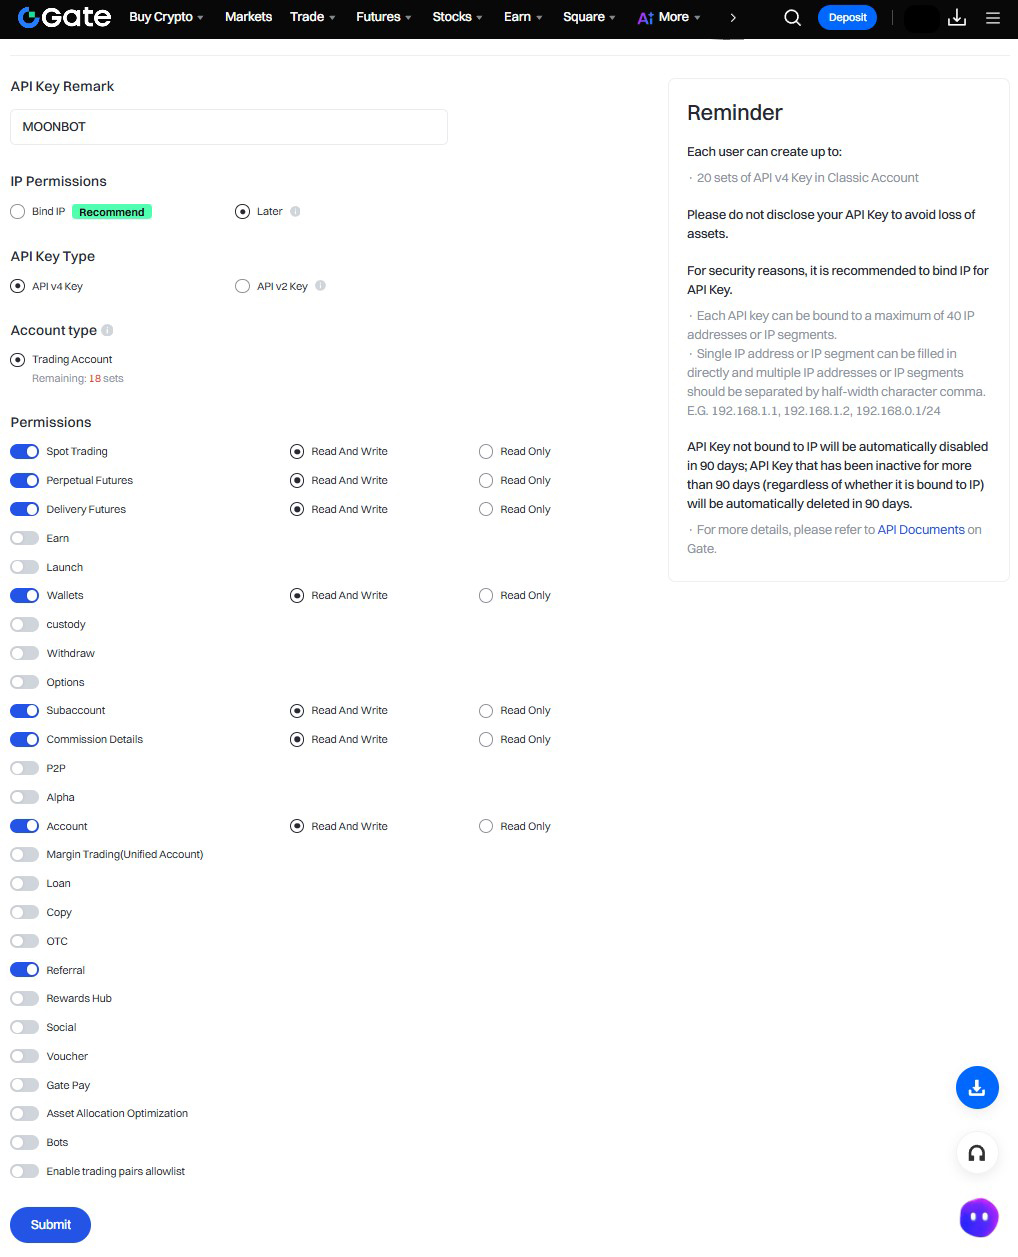
Then click the Submit button.
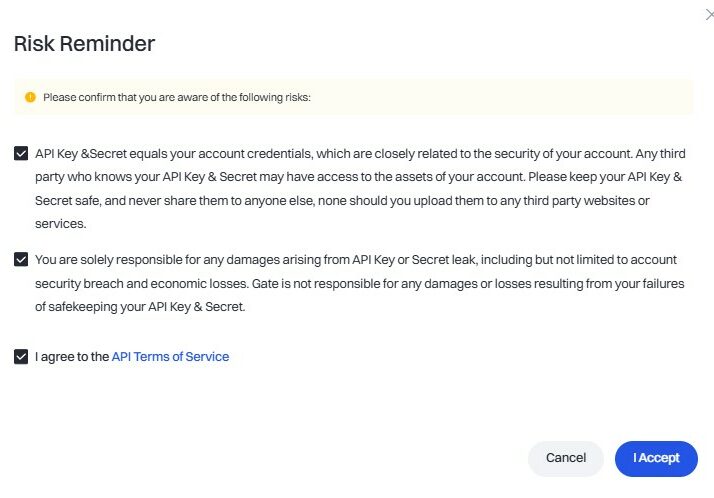
In the Risk Reminder window, select all three checkboxes and click I Accept.
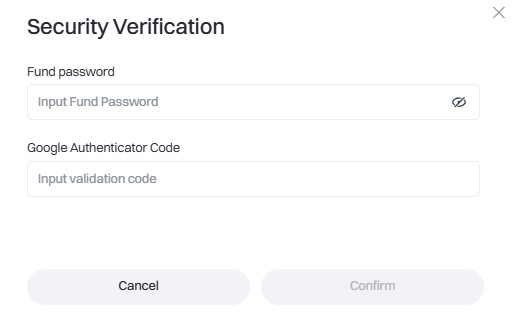
In the Security Verification window, enter the Fund password, enter the Google Authenticator Code, and click Confirm.
After completing these steps, the API keys will be successfully created.
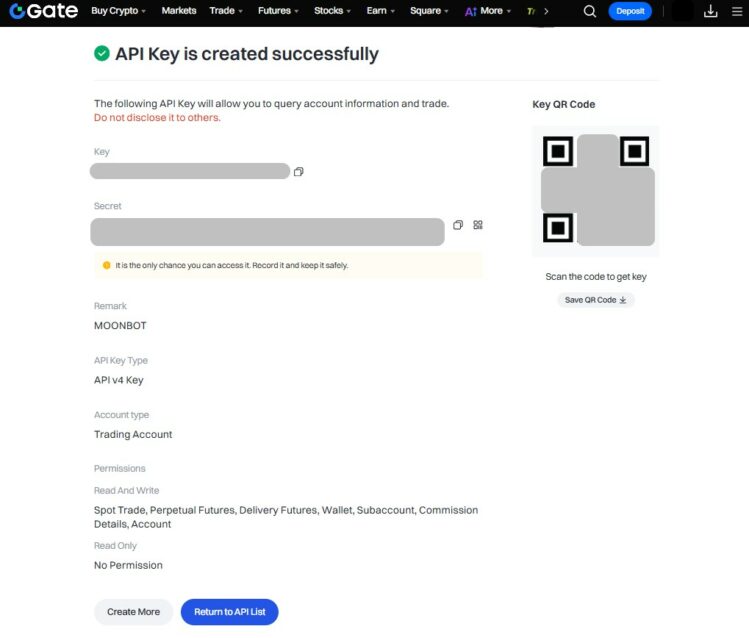
Important!
Save the Key (API Key) and Secret (Secret Key) in a text file on a USB drive or write them down on paper — these keys will be required to register them in the Moonbot terminal (on the Settings → Login tab).
How to Activate API Keys in the Terminal for the Gate Exchange
- Create API keys on the Gate exchange website for the main account or a subaccount;
- Copy the folder with your main PRO terminal for another exchange into a new folder and launch the terminal;
- Go to Settings → Login, in the Exchange field select Gate Spot or Gate Futures and click Apply;
- In Settings → Login, register the API keys from your main account or subaccount;
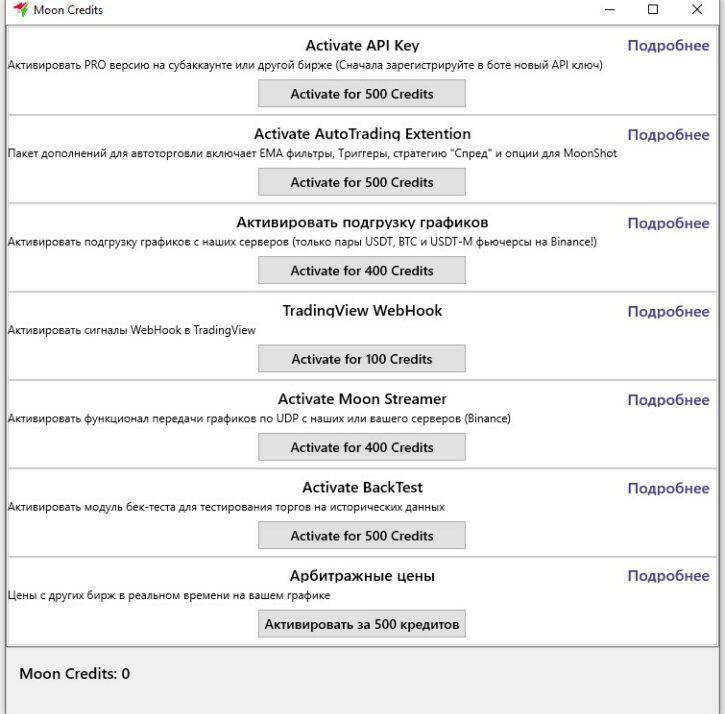
- In the lower-right corner of the main window of the Moonbot terminal, click the PRO version label to open the Moon Credits window with activation of paid modules (see the figure below);
- In the Moon Credits window, the lower section displays the balance of your Moon Credits; activating the main account or one subaccount requires 500 Moon Credits; if the balance is sufficient, in the Activate API Key block click the Activate for 500 Credits button — the API keys will be activated in this terminal;
- If the message Wrong account is displayed, this means that the account was not registered via the referral link specified above;
- If you need to activate additional subaccounts of the same exchange, repeat the procedure the required number of times.
Specific Features When Working with Gate (Including Current Limitations)
- Switching to a unified account (UTA, as on Bybit) is not required; moreover, without VIP2 status this is not possible;
- The Gate exchange offers a large number of trading pairs; because of this, Moonbot may use a significant amount of RAM; this is normal, however it is recommended to follow the rule “1 Moonbot per 1 VPS”;
- On the futures market, the available balance is updated with a delay;
- On the Gate website, futures trading is conducted in contracts; each coin has a fixed contract size (for example, for ETH the contract size is 0.01 ETH); in Moonbot this logic is hidden, and the volume is displayed in currency units; for example, a position of 0.01 ETH in the terminal corresponds to 1 ETH contract on the exchange website;
- On the spot market, loading the order book with a depth of 1000 levels may take up to 1 minute; during this period, an order book with a limited number of levels is available;
- After the first launch of Moonbot on futures, position initialization is performed within 2–3 minutes; during this period it is not possible to change leverage and maximum orders, and automatic leverage management does not work;
- After restarting, automatic leverage management also does not work during the first minutes; however, manual leverage adjustment is available;
- Public liquidations are likely not available in the API; for this reason, the liquidation strategy is not supported;
- Iceberg orders are supported both on futures and on the spot market; the visible part of the order is set to the minimum lot size;
- The “Hedge mode” in the terminal is not supported;
- Due to a low API limit for market requests, the initial loading of market data may take a considerable amount of time; for manual trading it is recommended to disable the Settings → Main → Analyze coins on startup option;
- For automated trading, strictly follow the rule “1 Moonbot per 1 VPS”; the recommended VPS hosting region is Tokyo (Japan);
- On the futures market, the API does not transmit commission values; discrepancies may appear in the report compared to the actual profit by the amount of the maker fee.